

Configuring VCS Integrations Online
Um eine Integration mit einem Versionsverwaltungssystem zu konfigurieren, gib die zu übersetzenden Quelldateien und die Struktur an, die Crowdin für die übersetzten Dateien in deinem Repository verwenden soll.
Once you’ve selected your repository and branch for translation, the next step is to configure the selected branch. Click to open the Branch Configuration dialog and start the configuration. In the Branch Configuration dialog, you can either load the existing configuration file stored in your repository or create a new configuration from scratch.
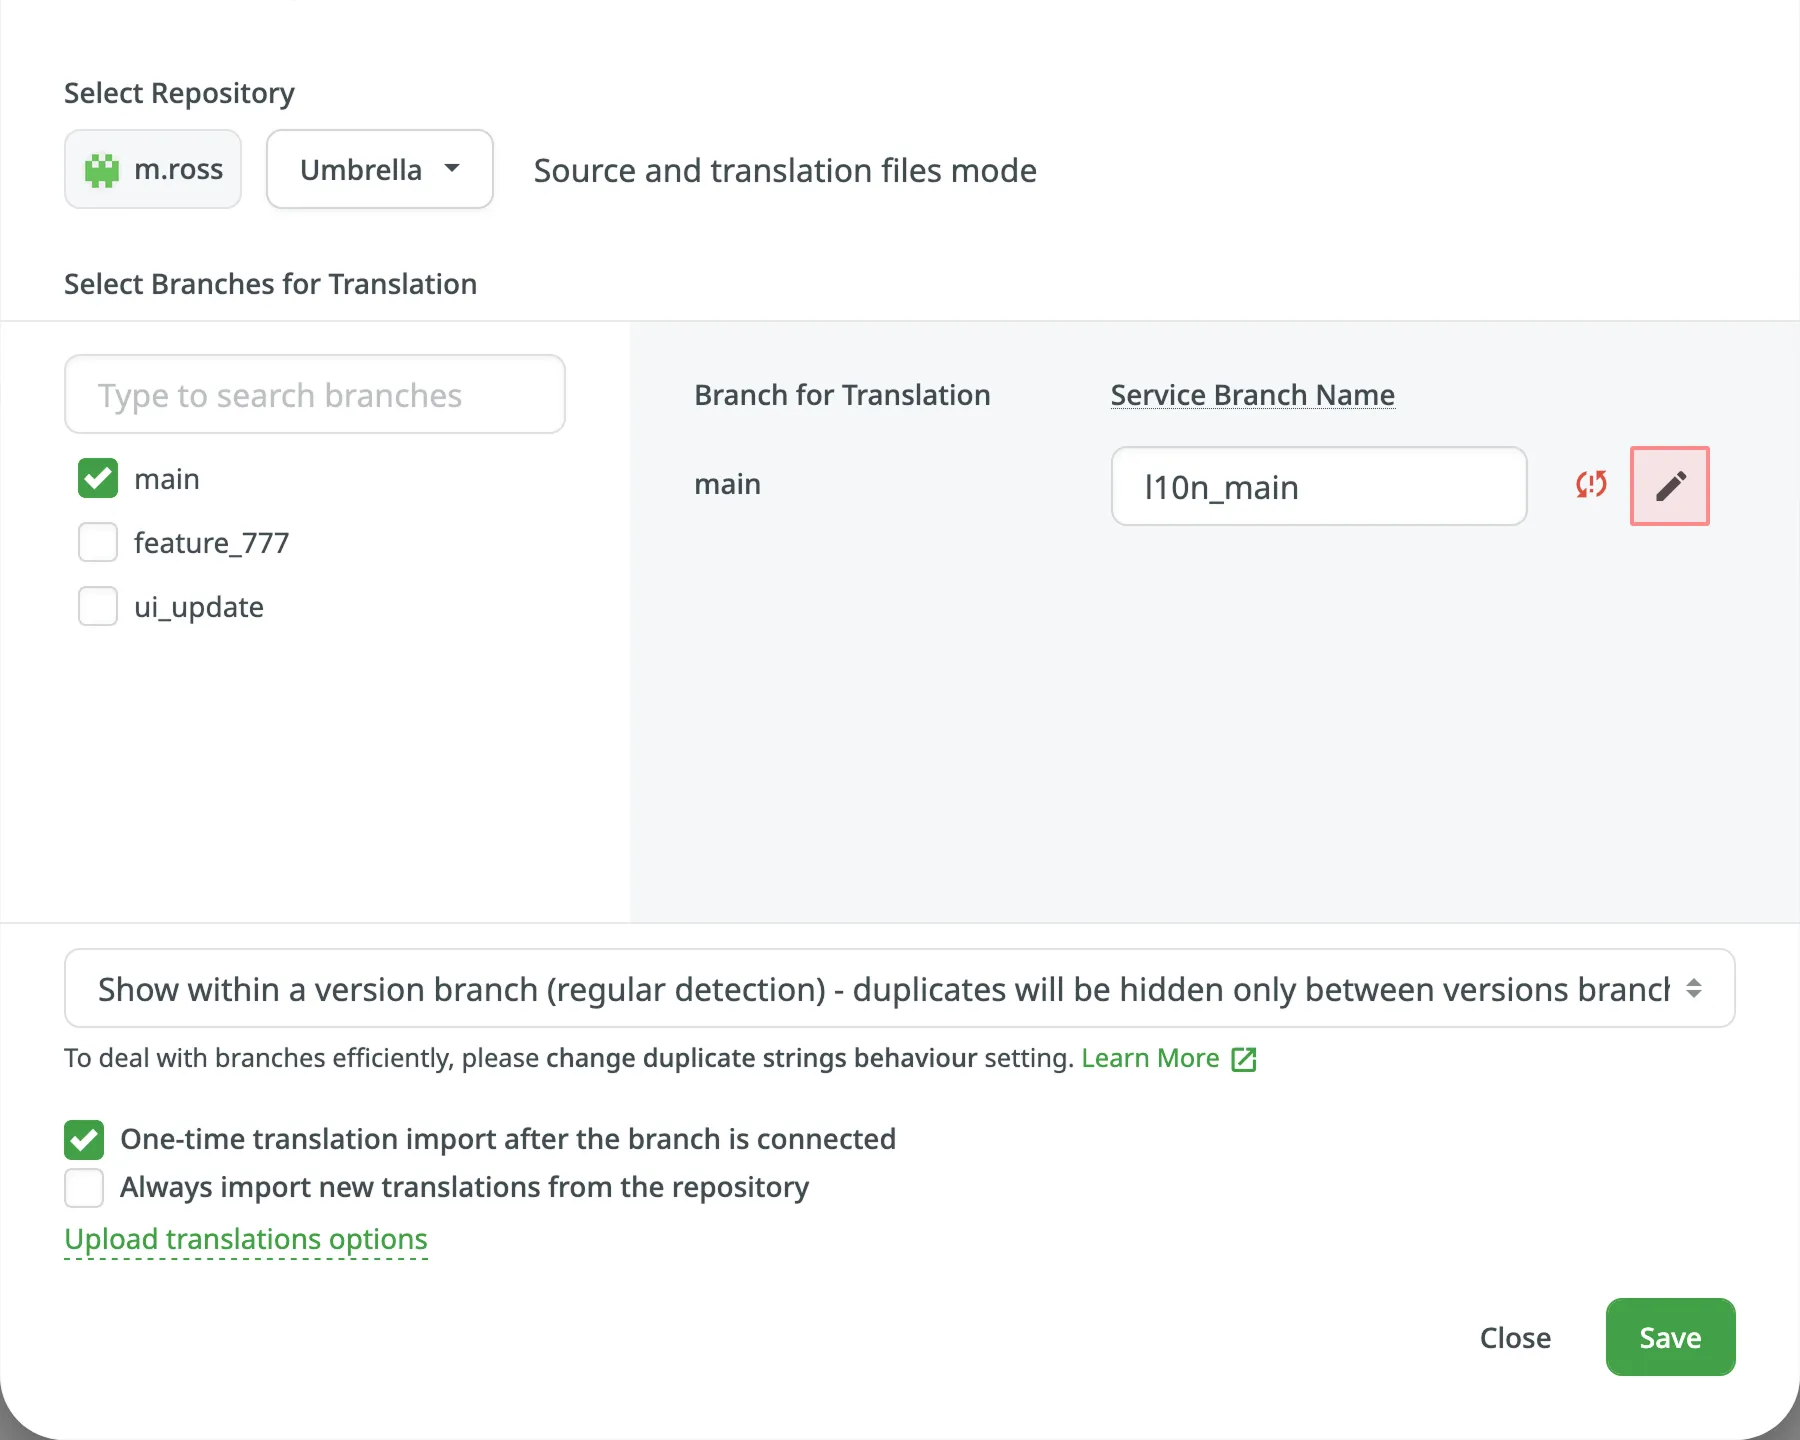
If you want your VCS integration to work in the Target File Bundles Mode, you need to configure target file bundles for each branch you have selected for translation.
Mehr über die Konfiguration von Ziel-Dateibundles für VCS-Integrationen erfahren.
To load the existing configuration file stored in your repository, follow these steps:
- Klicke auf und wähle Konfiguration laden.
- Gib den Namen der Konfigurationsdatei in deinem Repository an.
- Click Continue.
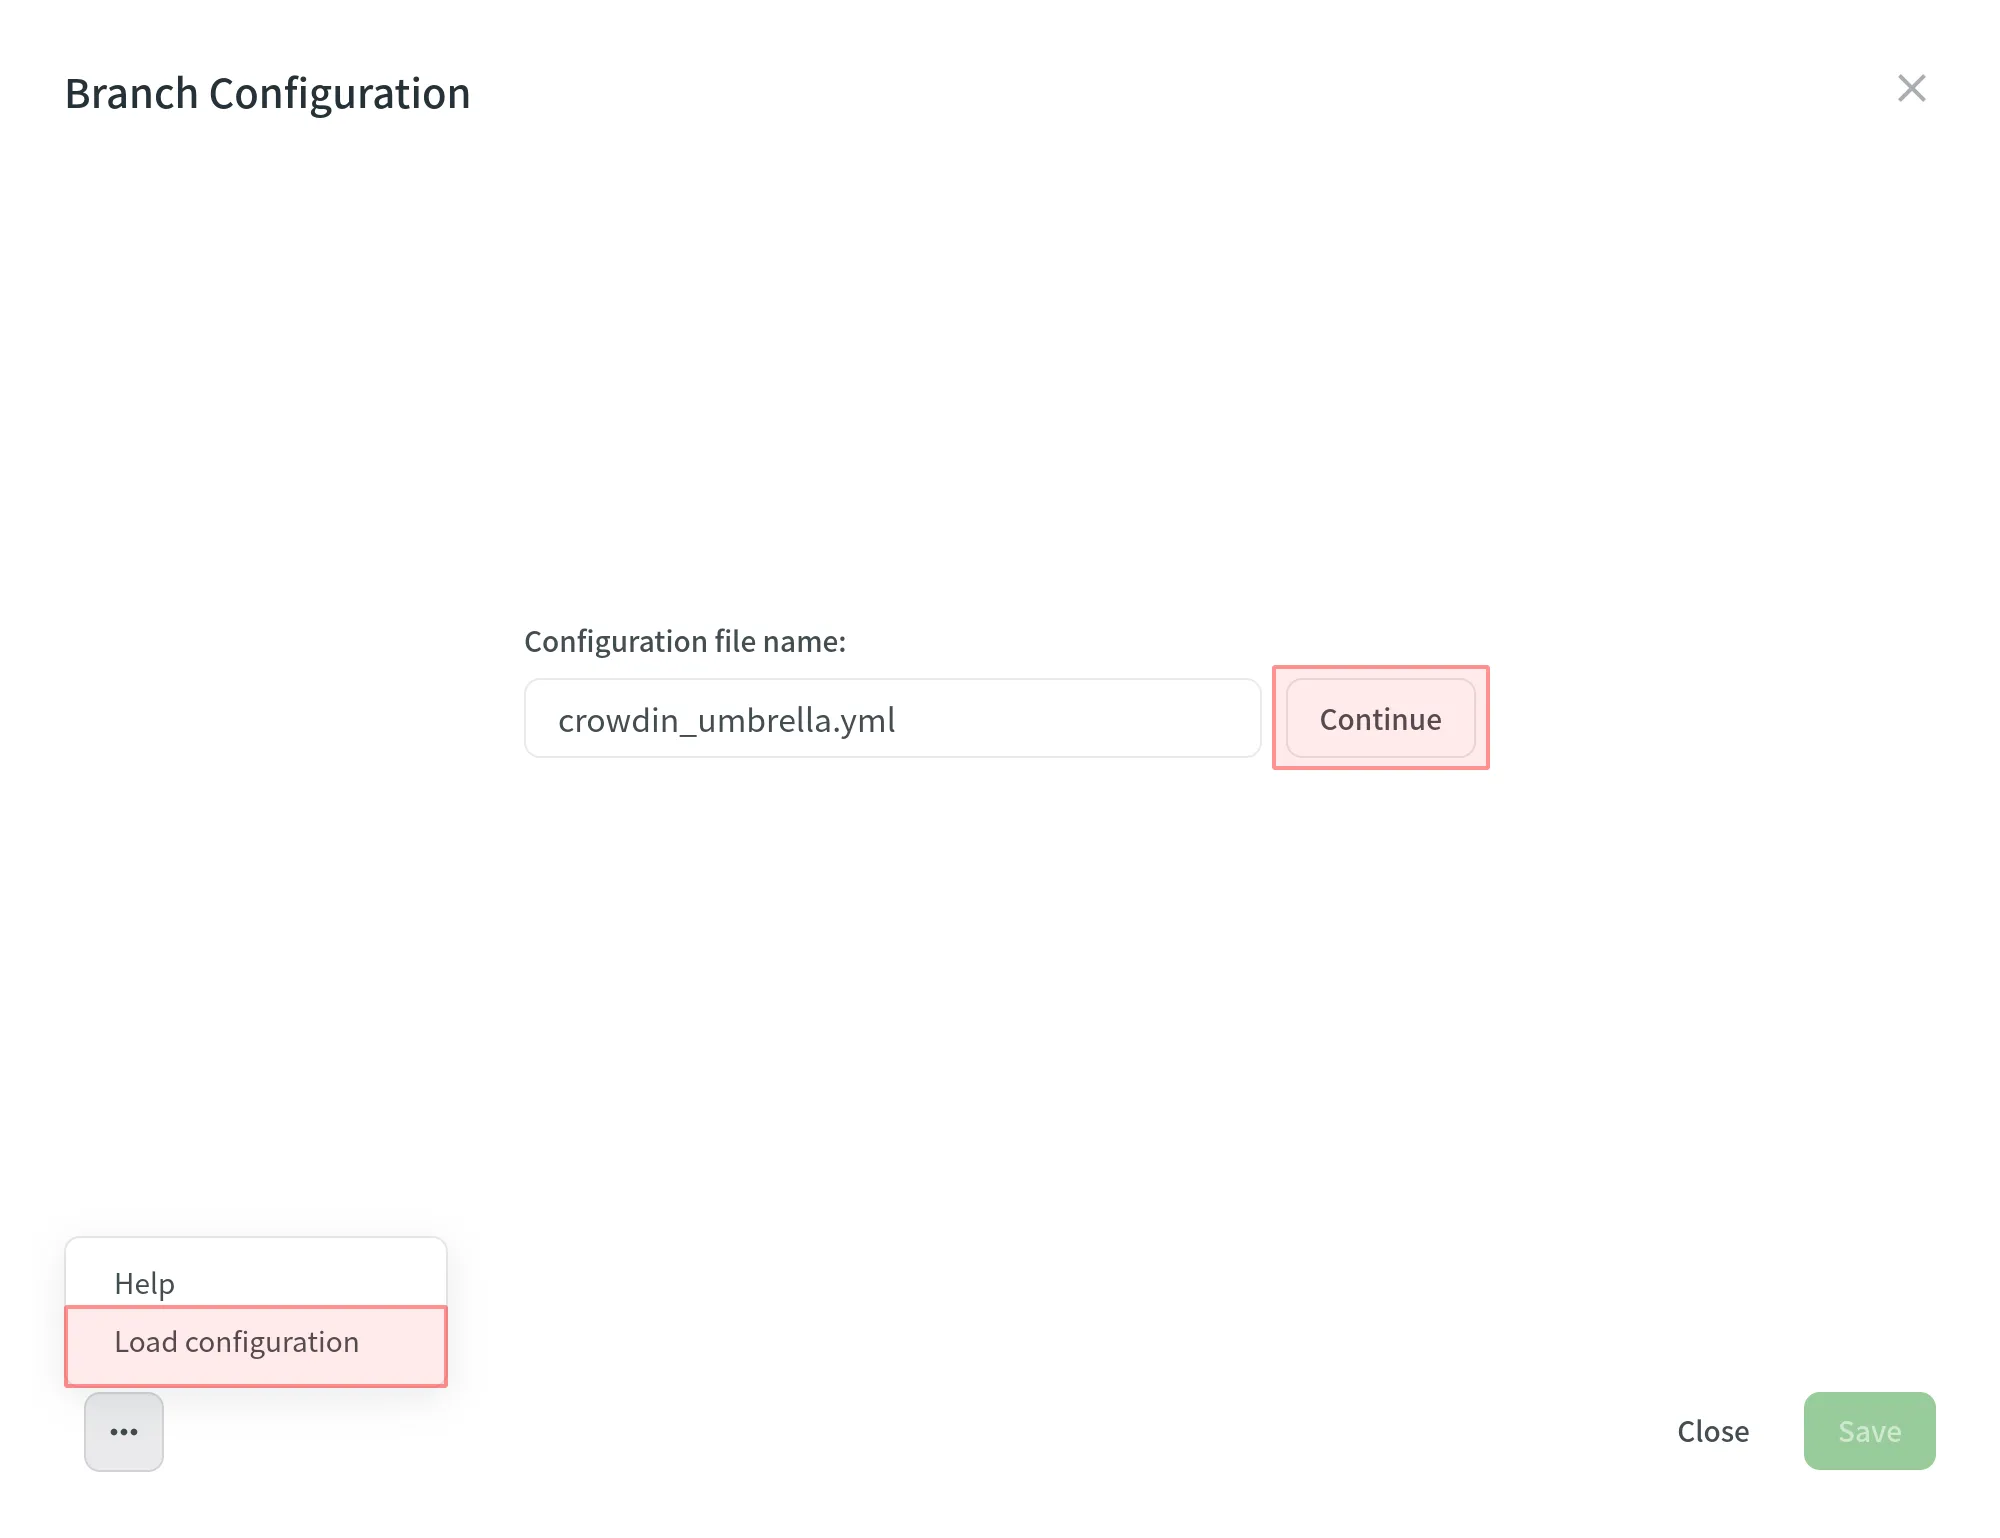
The configuration will be displayed in the Branch Configuration dialog. You can use it as is or modify it if necessary.
To create a new configuration file to be used by the integration, specify the preferred name and click Continue in the Branch Configuration dialog.
Then specify the source and translated file paths using the patterns and placeholders listed below. In the right panel, you can preview the structure of the source files that will be uploaded for translation and the structure of the translated files based on the specified paths.
Once you’ve finished setting up the configuration for the selected branch and saved the changes, the configuration file will be saved in the root of the translation branch in your repository.
You can use wildcard (*, **, ?, [set], \) patterns to specify which files should be uploaded for translation.
Read more about wildcard patterns.
Use placeholders to specify where translated files will be placed and how they will be named:
| Name | Description |
|---|---|
%original_file_name% | Ursprünglicher Dateiname |
%original_path% | Nimmt Namen der übergeordneten Ordner im Crowdin-Projekt, um den Dateipfad im resultierenden Bundle zu erstellen |
%file_extension% | Ursprüngliche Dateierweiterung |
%file_name% | Dateiname ohne Erweiterung |
%language% | Sprachname (z. B. Ukrainisch) |
%two_letters_code% | ISO-639-1-Sprachcode (z. B. uk) |
%three_letters_code% | ISO-639-2/T-Sprachcode (z. B. ukr) |
%locale% | Gebietsschema (z. B. uk-UA) |
%locale_with_underscore% | Gebietsschema (z. B. uk_UA) |
%android_code% | Android-Standort-ID für die Benennung von „values-“-Ordnern |
%osx_code% | OS-X-Standort-ID für die Benennung von „lproj“-Ordnern |
%osx_locale% | OS X-Gebietsschema, das zur Benennung von Übersetzungsressourcen verwendet wird (z. B. uk, zh-Hans, zh_HK) |
The advanced settings provide more control over the integration’s behavior. You can specify files to be excluded from translation, map custom language codes, and configure parsing options for structured file formats, such as spreadsheets and XML. This section also covers additional parameters that can be configured by manually editing the crowdin.yml file in your repository.
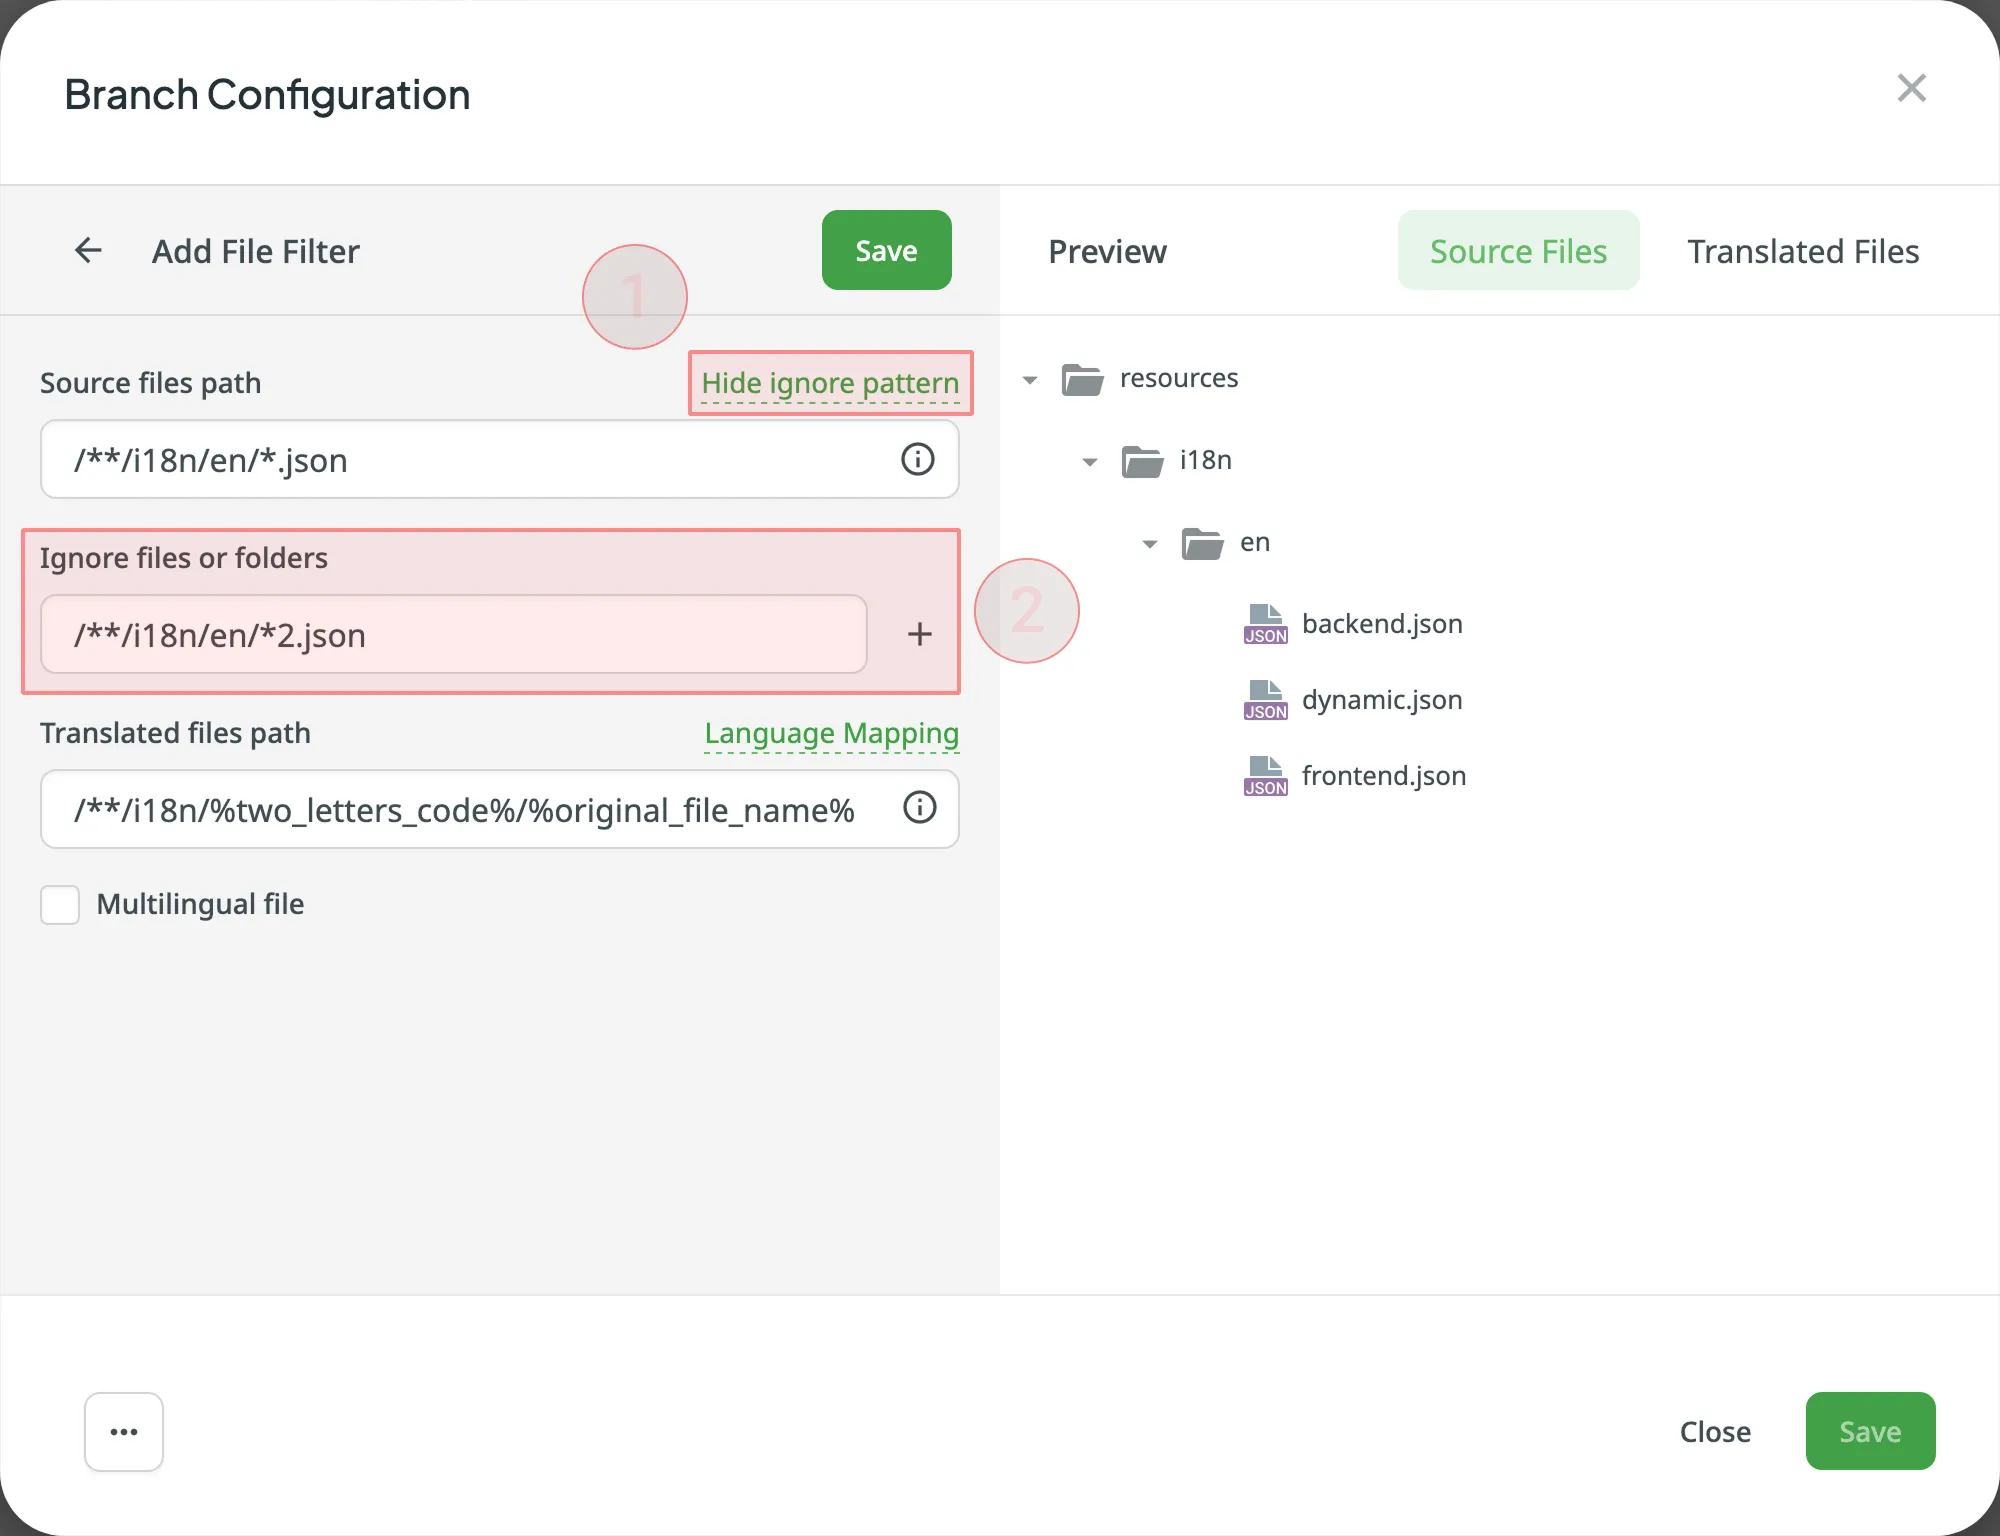
Wenn bestimmte Dateien nicht übersetzt werden sollen, klicke auf Ignoriertes Muster hinzufügen, gib das Muster für diese Dateien an, und Crowdin lädt diese Dateien nicht zur Übersetzung hoch.
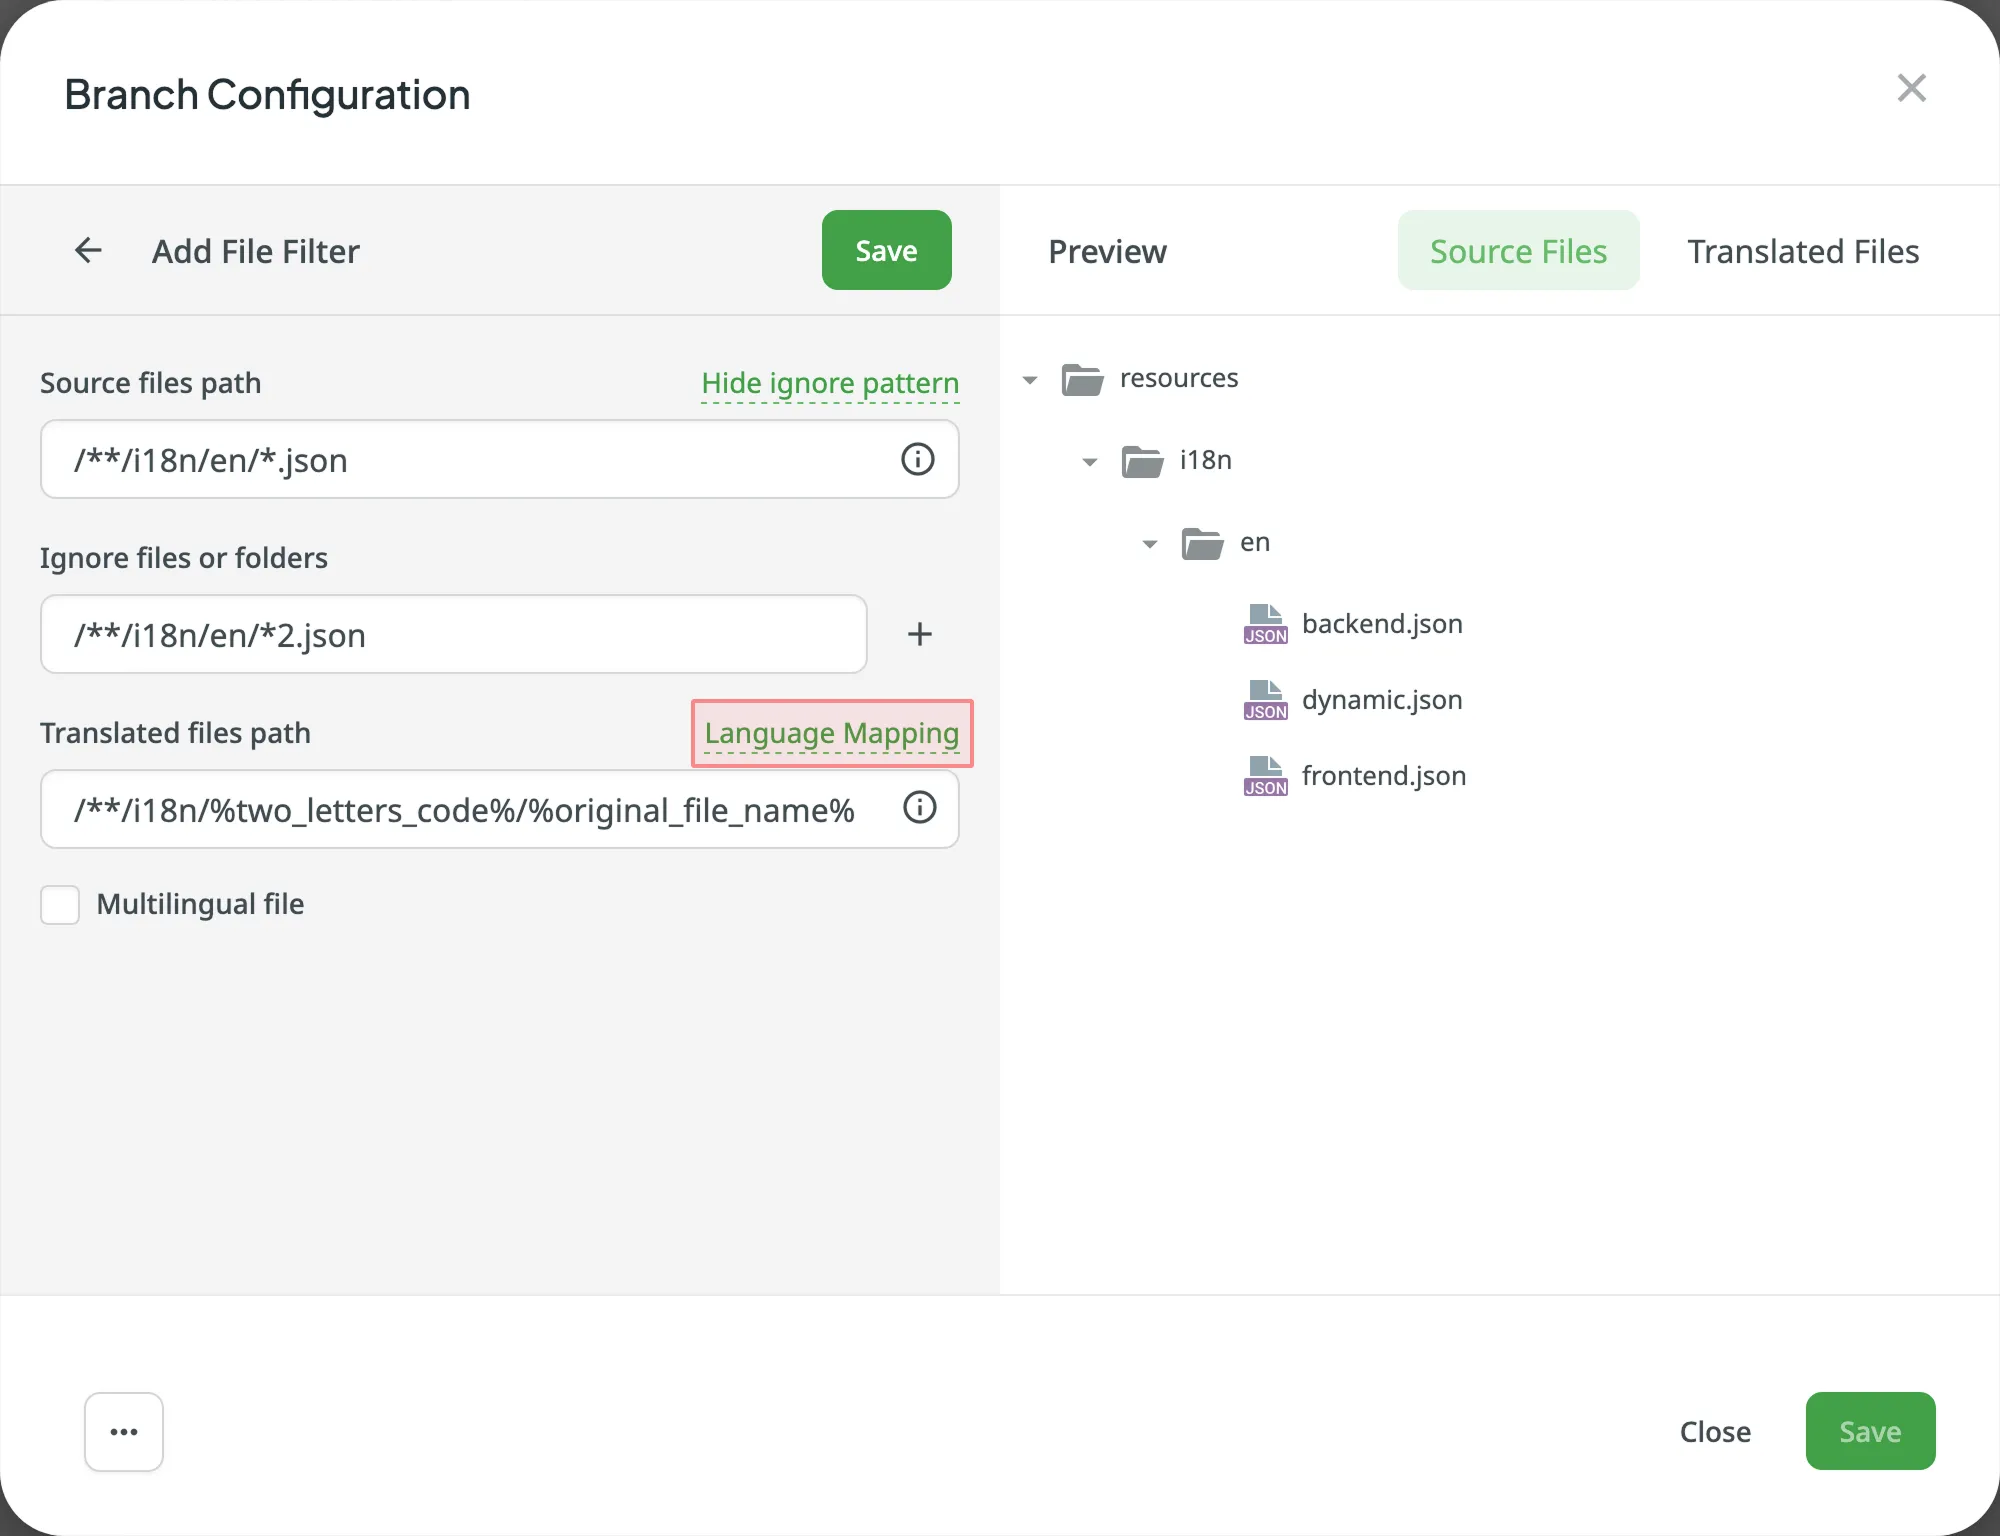
Wenn dein Projekt benutzerdefinierte Namen für Sprachverzeichnisse verwendet, kannst du die Sprachzuordnung verwenden, um deine eigenen Sprachen den von Crowdin erkannten Sprachen zuzuordnen.
To add a language mapping, follow these steps:
- Click Language Mapping.
- Select the necessary language and a placeholder.
- Specify your custom code.
- Click Add Mapping to add another custom code.
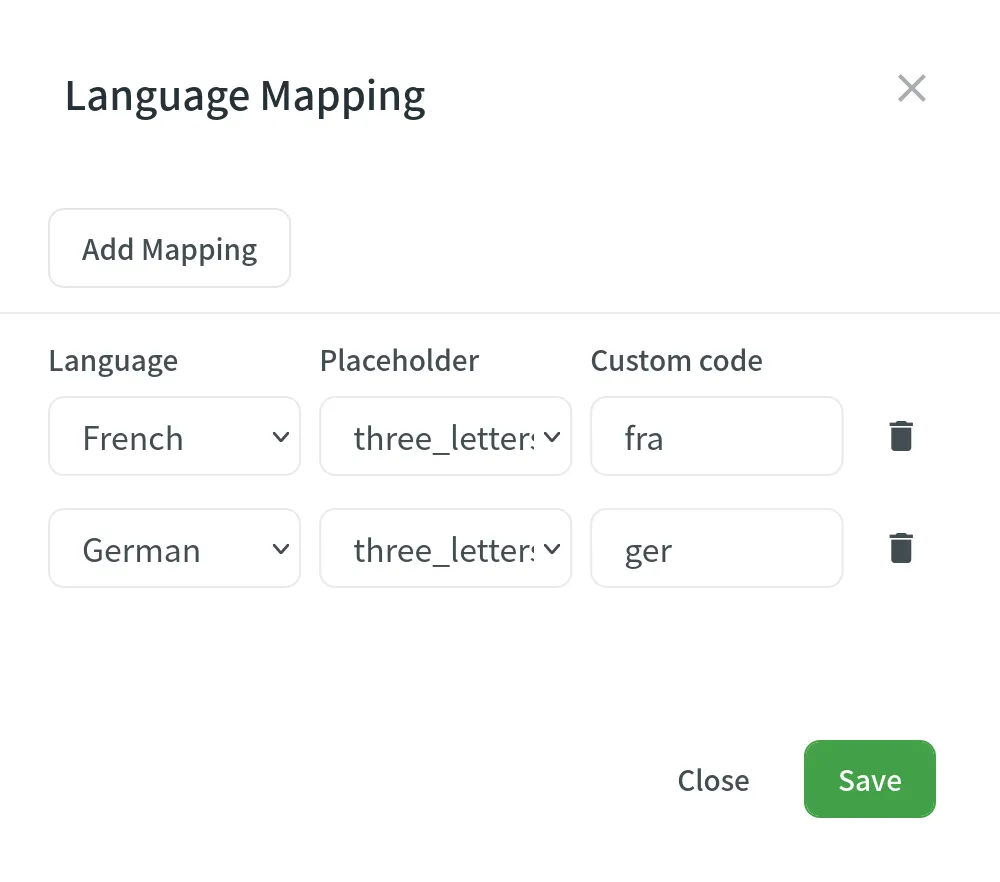
- Click Save.
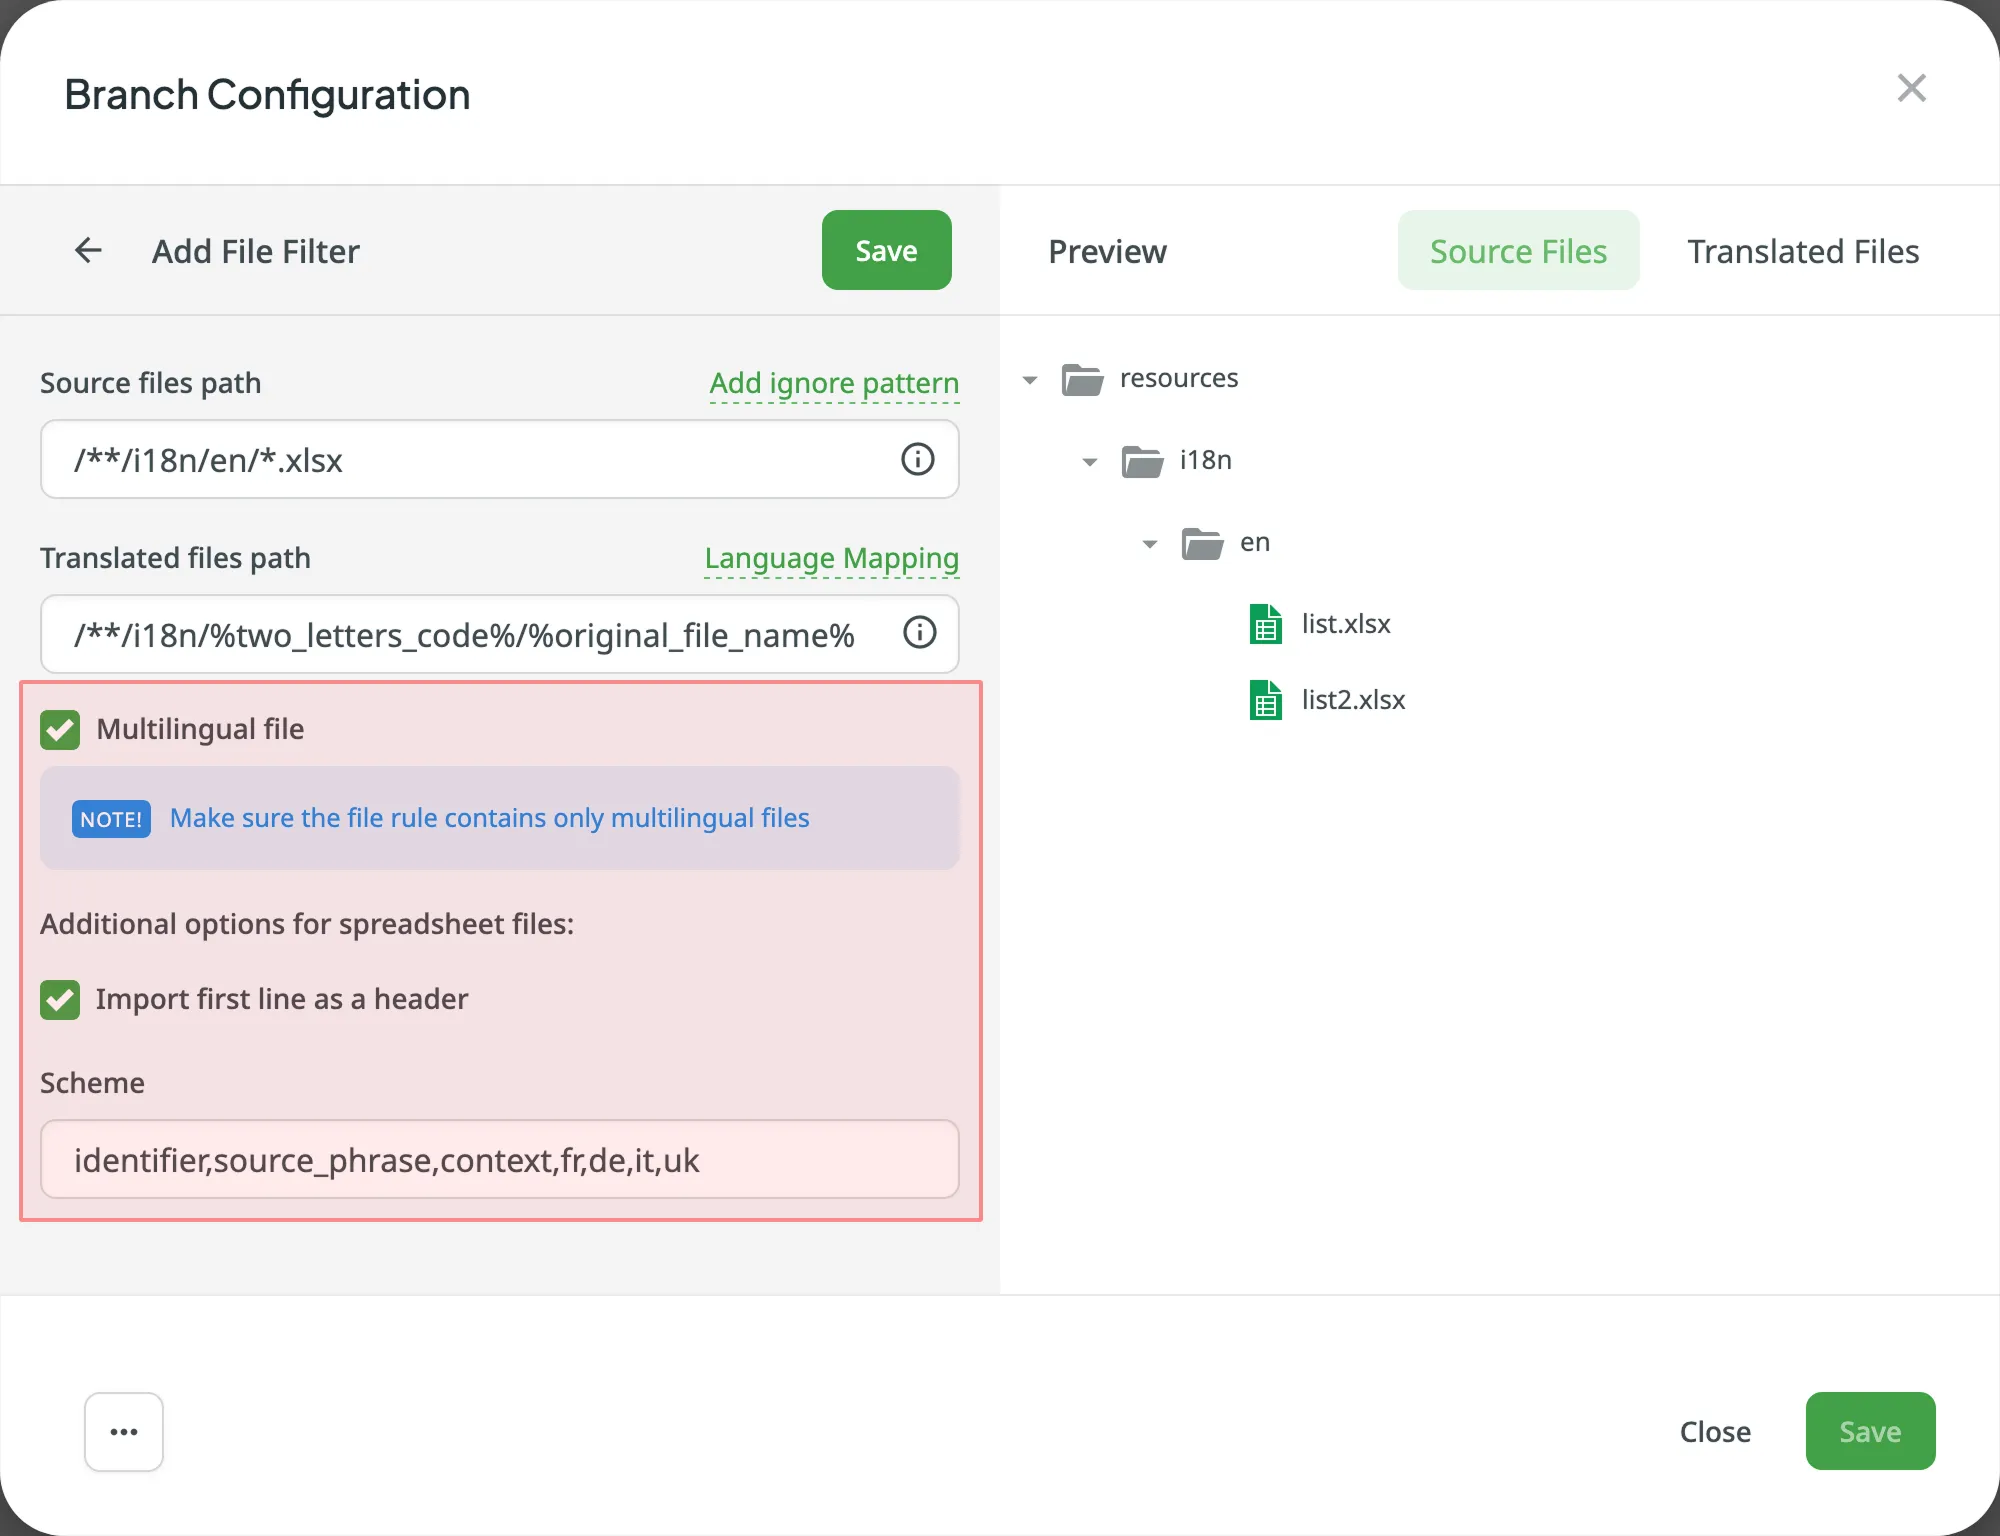
You can specify the scheme of your spreadsheet file in the Scheme field. To create the scheme for your CSV or XLS/XLSX file, use the following constants:
identifier– column contains string identifiers.source_phrase– column contains source strings.source_or_translation– column contains source strings, but the same column will be filled with translations when the file is exported. If you upload existing translations, the values from this column will be used as translations.translation– column contains translations.context– column contains comments or context information for the source strings.max_length– column contains max.length limit values for the string translations.labels– column contains labels for the source strings.none– column that will be skipped during import.
Scheme example: identifier,source_phrase,context,fr,de,it,uk (Language Codes).
If a spreadsheet contains the translations for several target languages, select Multilingual file. If you don’t want to translate the text stored in the first row, select Import first line as a header.
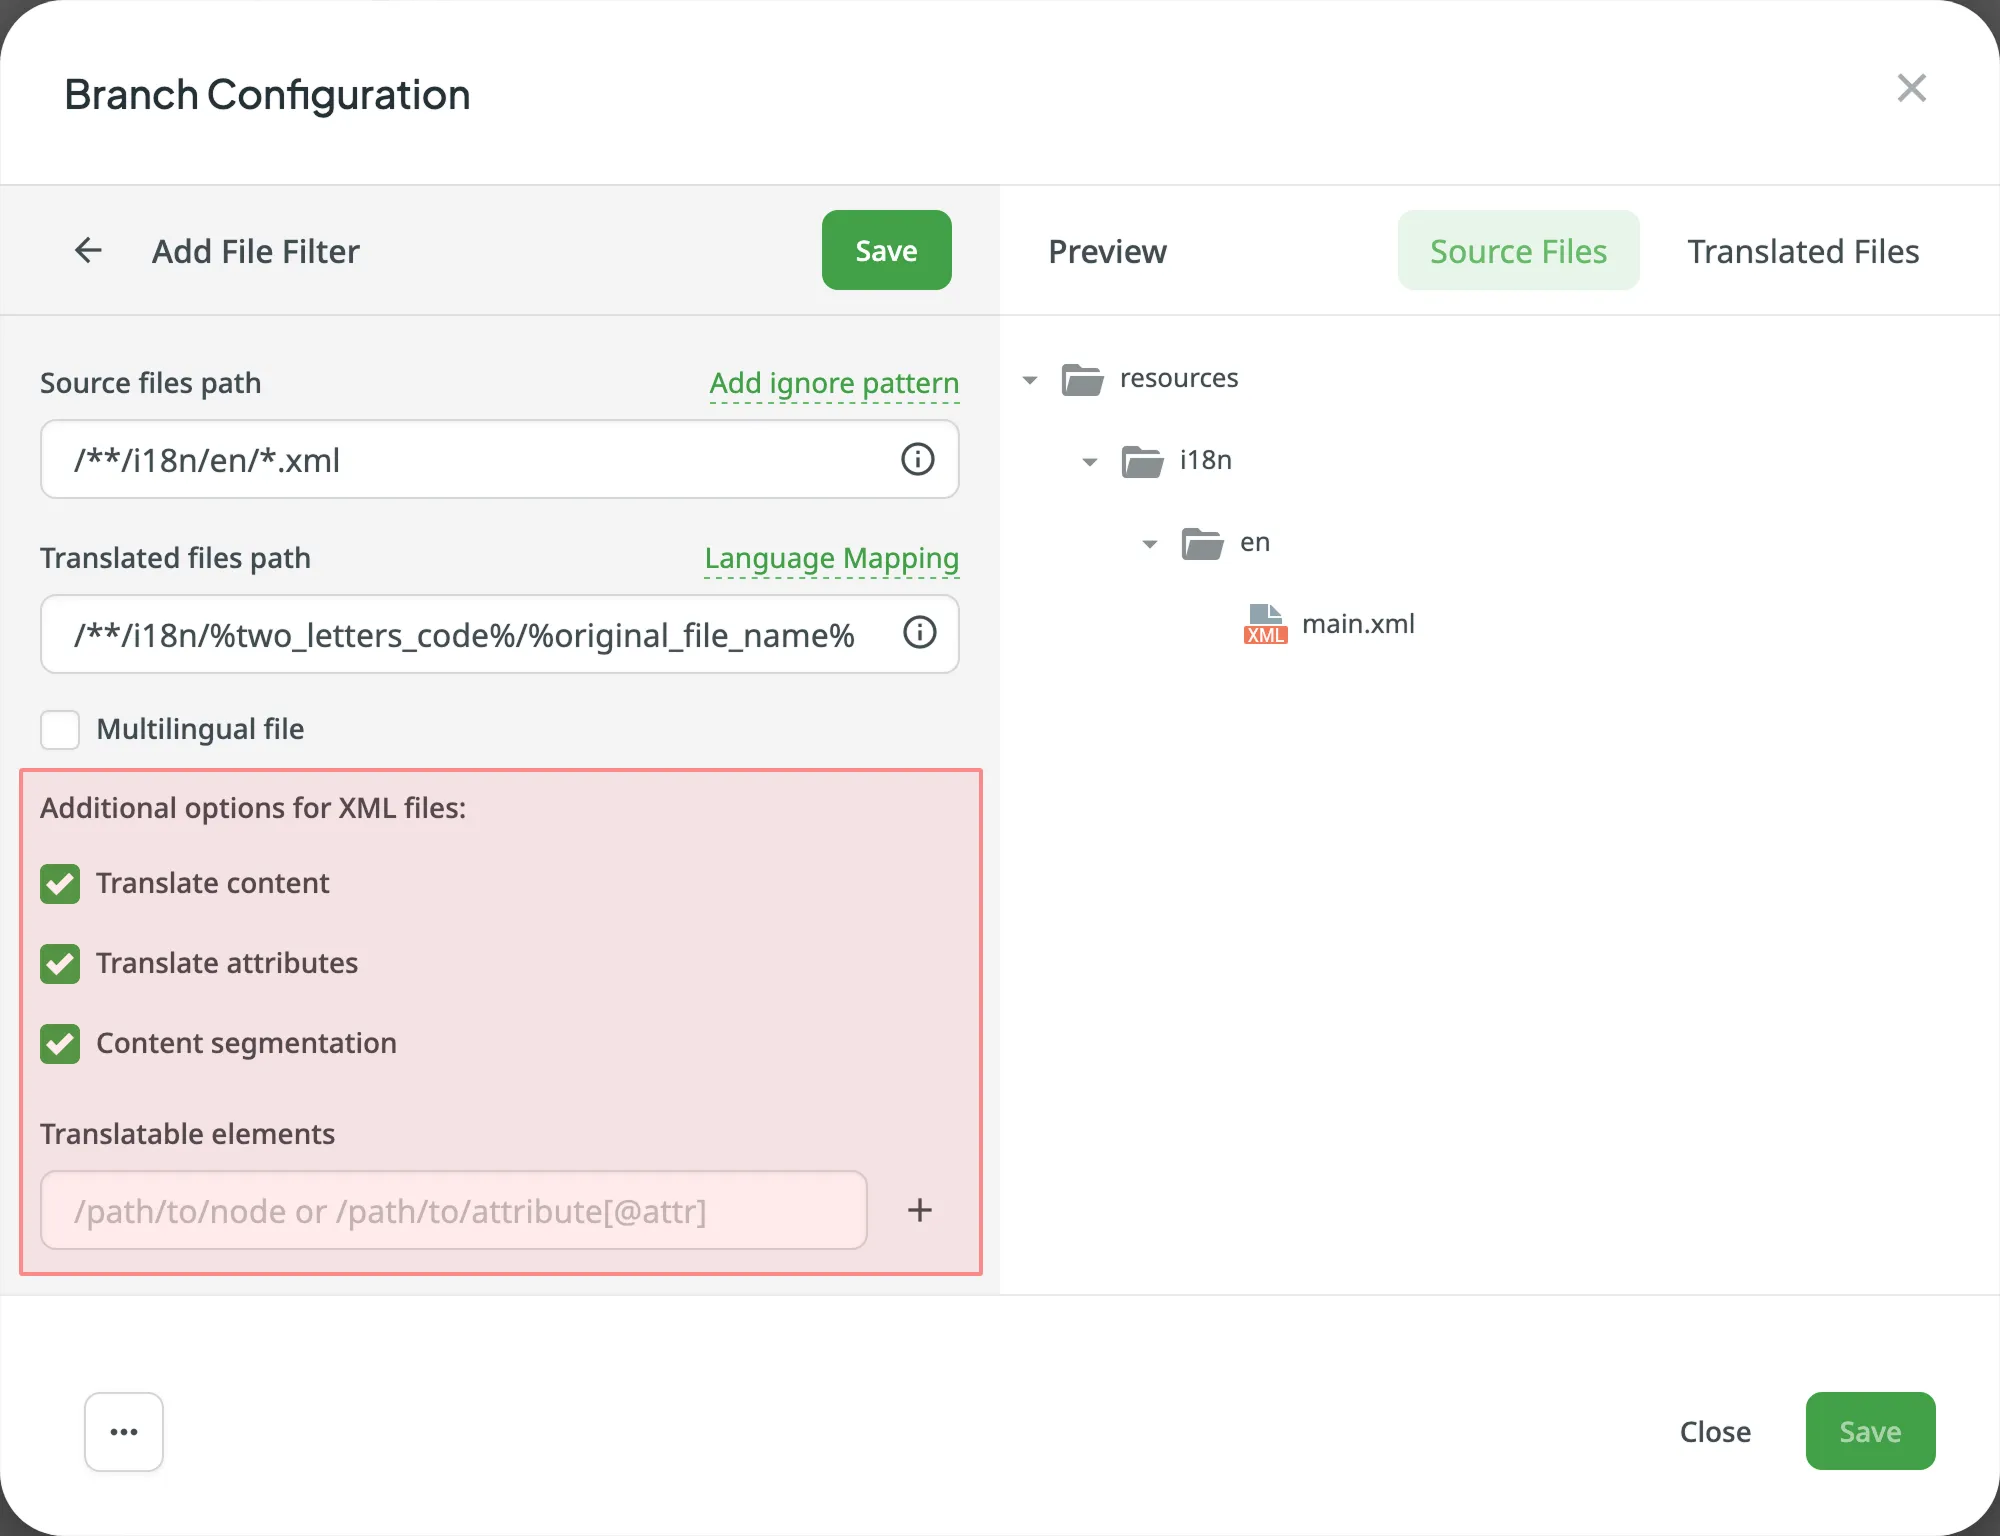
Du kannst die Einstellungen für den Import von XML-Dateien konfigurieren, um festzulegen, wie Crowdin mit den XML-Dateien umgehen soll.
| Option | Description |
|---|---|
| Translate Content | Select to translate texts stored inside the tags. |
| Translate Attributes | Select to translate tag attributes. |
| Content Segmentation | Select to split the XML source file’s content into shorter text segments. |
| Translatable Elements | This is an array of strings, where each item is the XPaths to the DOM element that should be imported. Sample path: /path/to/node or /path/to/attribute[@attr] |
The following parameters can’t be configured online:
preserve_hierarchy– behält die Verzeichnisstruktur in Crowdin beidest– ermöglicht die Angabe eines Dateinamens in Crowdintype– ermöglicht die Angabe eines Dateityps in Crowdinupdate_option- keeps translations and keeps/removes approvals of changed strings during a file updatecommit_message- additional text appended to the default commit messageappend_commit_message- controls whether your custom text is appended to or replaces the default commit messageexport_languages- export translations for the specified languages
Once you save the online configuration, a crowdin.yml file is saved in the root of the configured branch in your repository. You can edit this file manually to add the necessary parameters.
Read more about the configuration file.
- Klicke auf Speichern, um die erstellte Konfiguration in der Vorschau anzuzeigen.
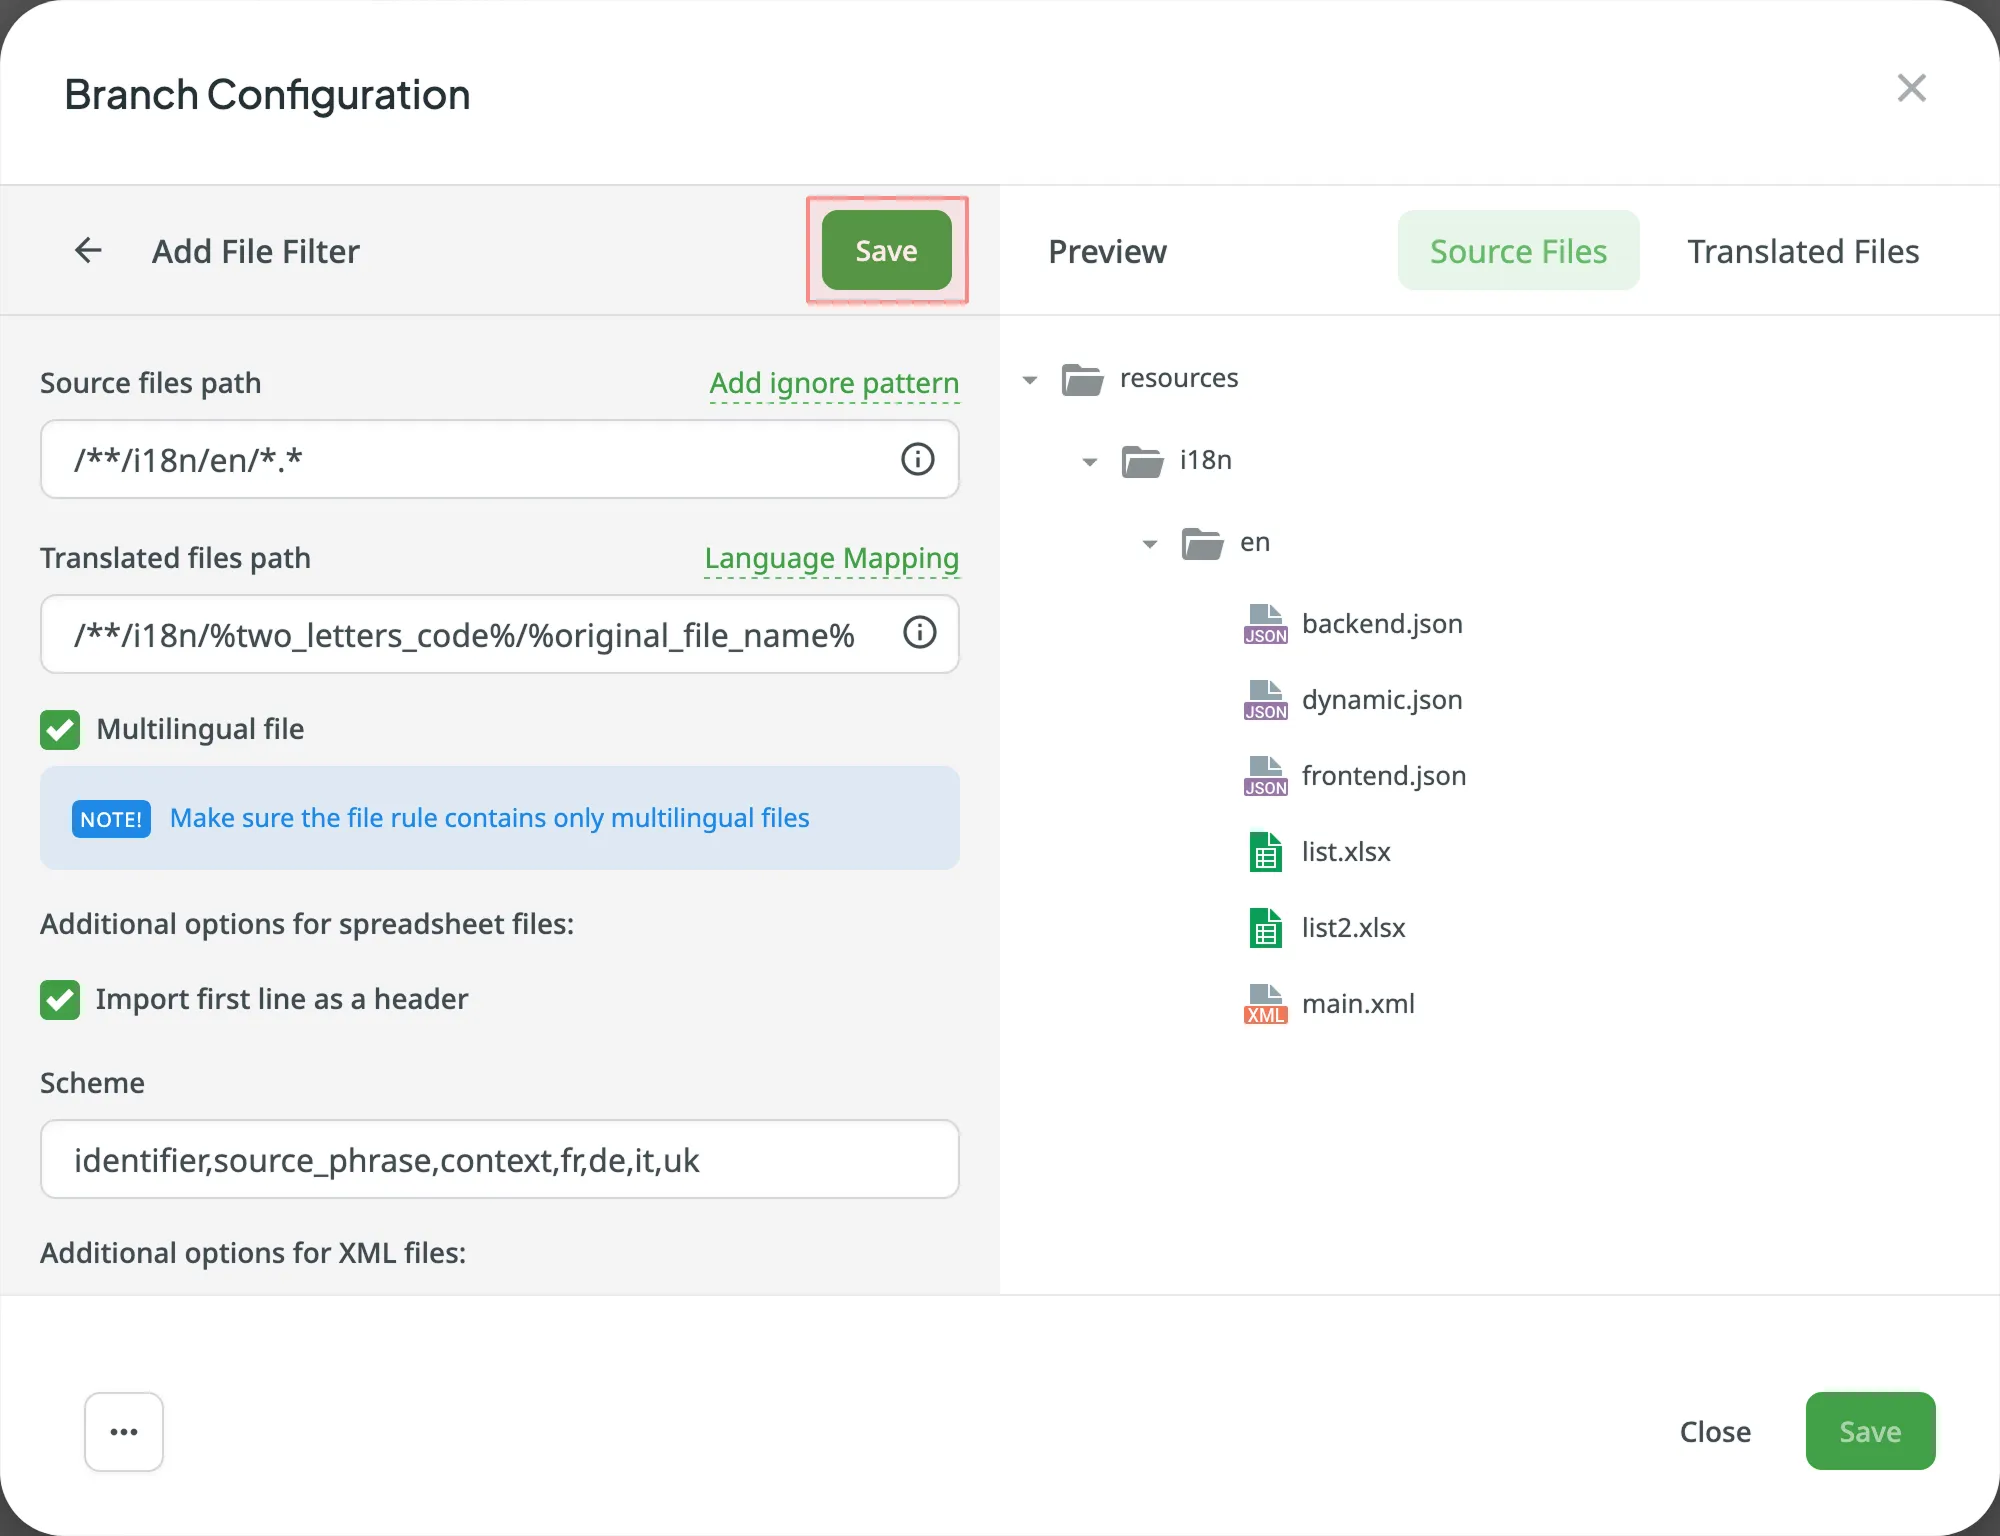
- Click Add File Filter if you have multiple file groups with different configurations.
If several branches in the project have the same configuration, and you want the same filters to be applied to them, select Apply filters to all translatable branches. - Click Save to save the created configuration.
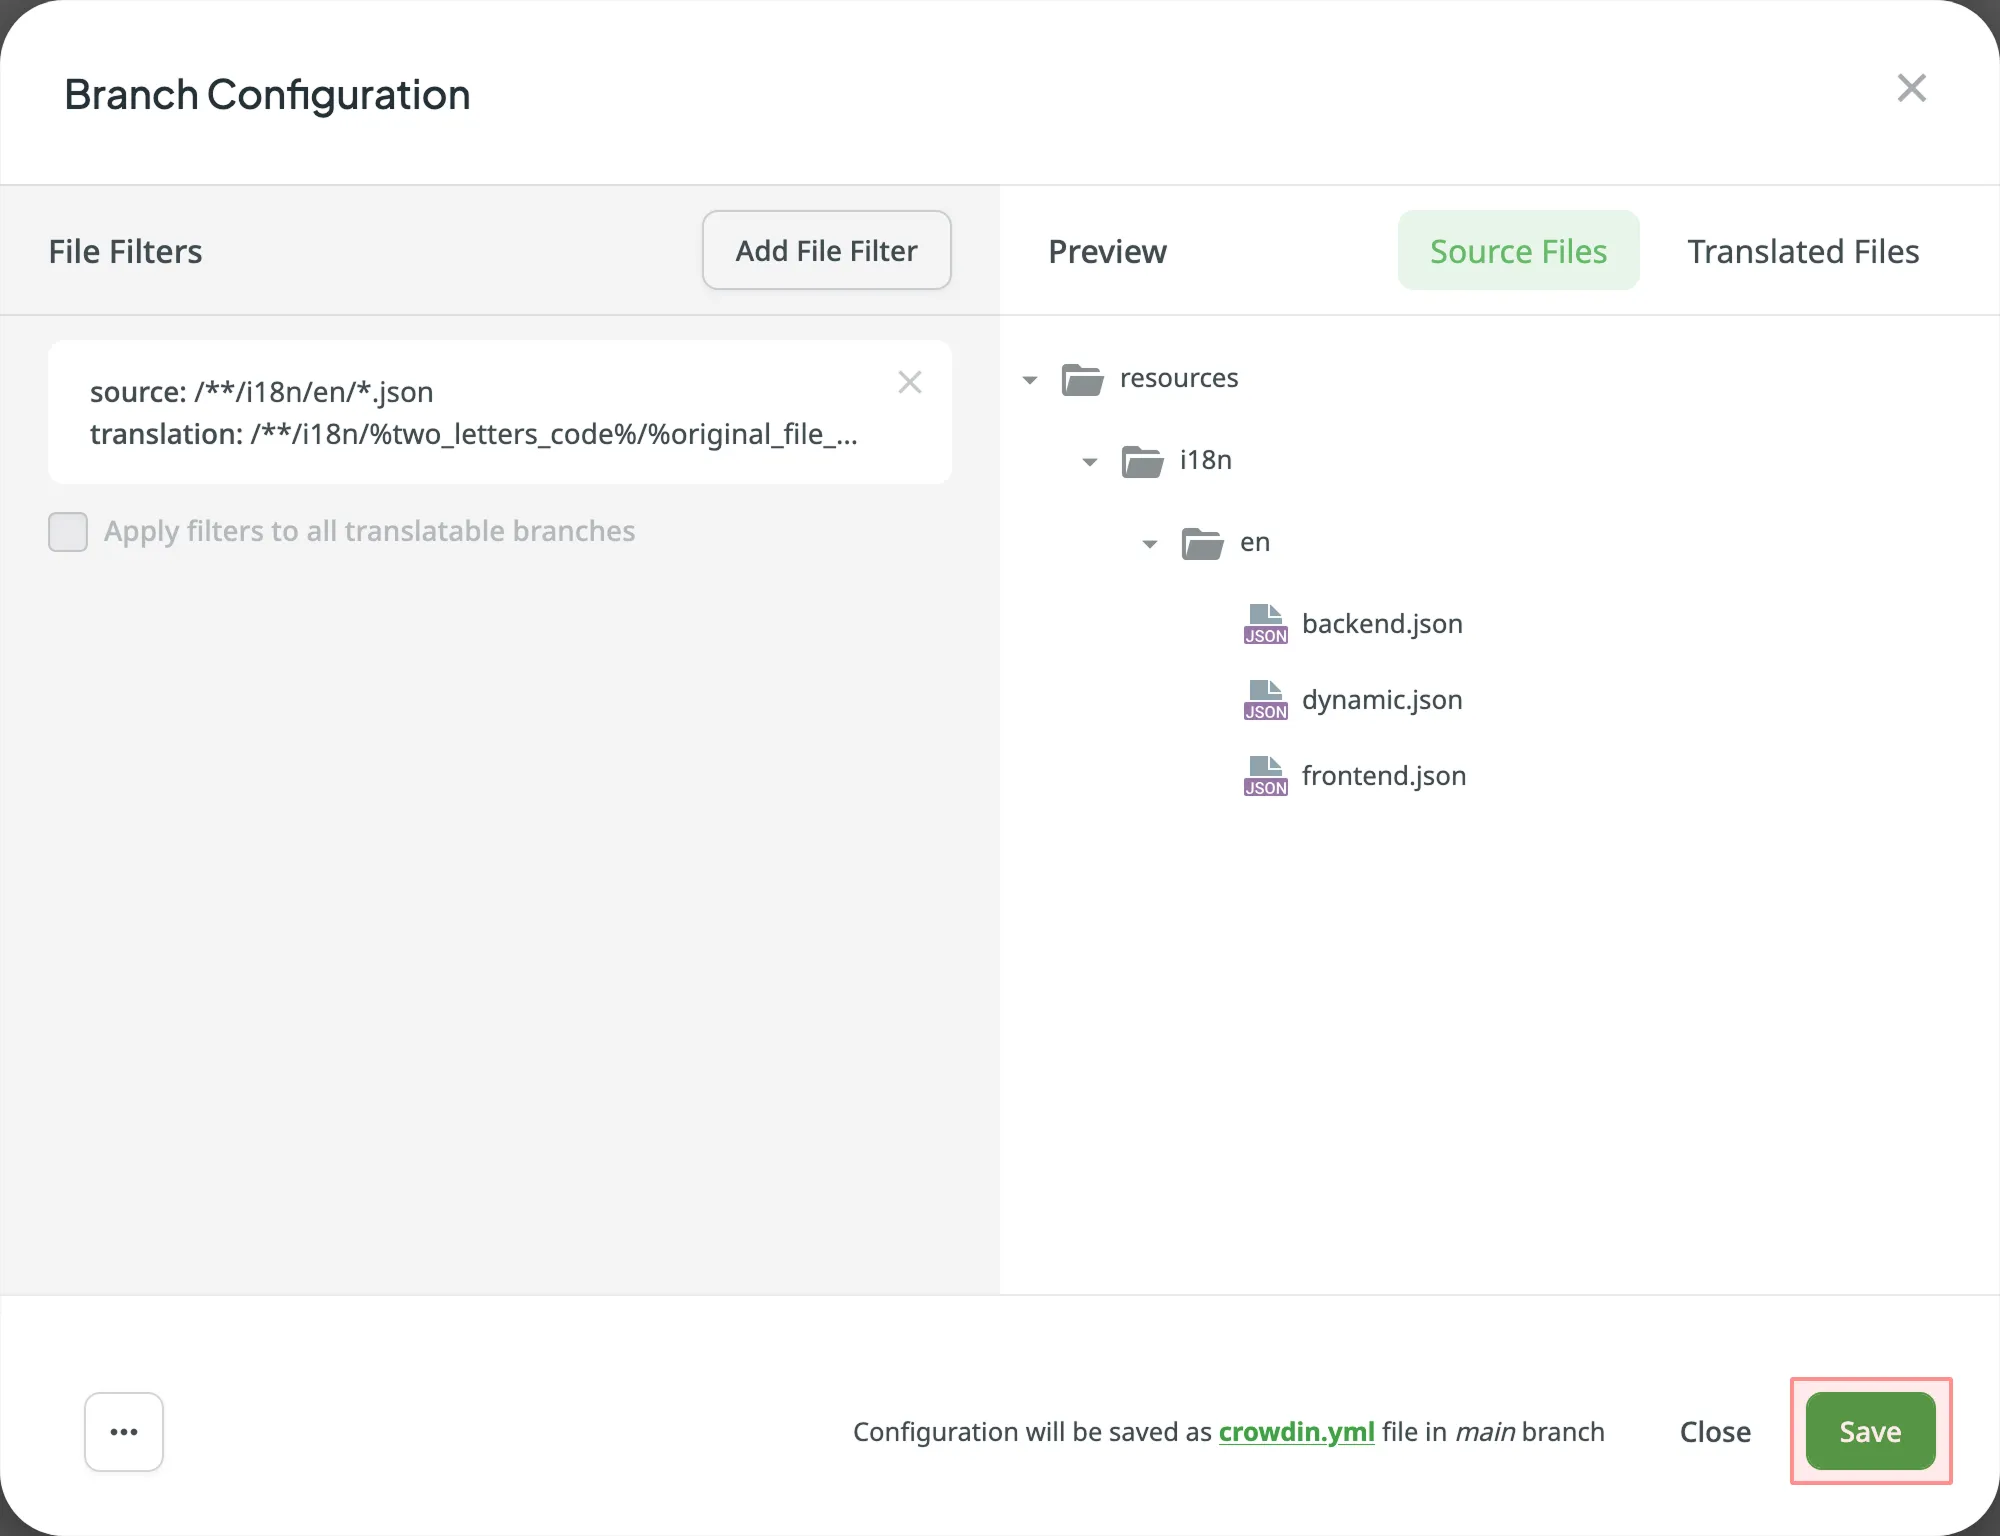
Sobald die Konfiguration gespeichert ist, werden die lokalisierbaren Dateien in dein Crowdin-Projekt hochgeladen.